Powered by Blogger.
Showing posts with label loop. Show all posts

How To Make A Slip Knot

Start with a bowline knot.


Pull string through the bowline loop.


This knot is used to slip tight onto whatever is put through the loop.


Make sure the loop on the bowline knot is as small as you can get it to make the slip knot more effective.

Using The Net Needle

This page is to show how to equip the net needle once you have one made and ready.


Place the end of the string flat against the needle in a loop.


Feed the loop around the peg of the needle.


Tighten the loop.


Fold the string around the back of the needle and flip it over.


Hold the string on this side and make a new loop to fit around the peg.


Repeat this process until you can't put on any more string. You don't need to have a previously cut string. Just feed the string onto the needle without cutting it.


When finished, cut the string and your ready to weave a net.


Making A Purse Net - Part 2

Part 1 is here.


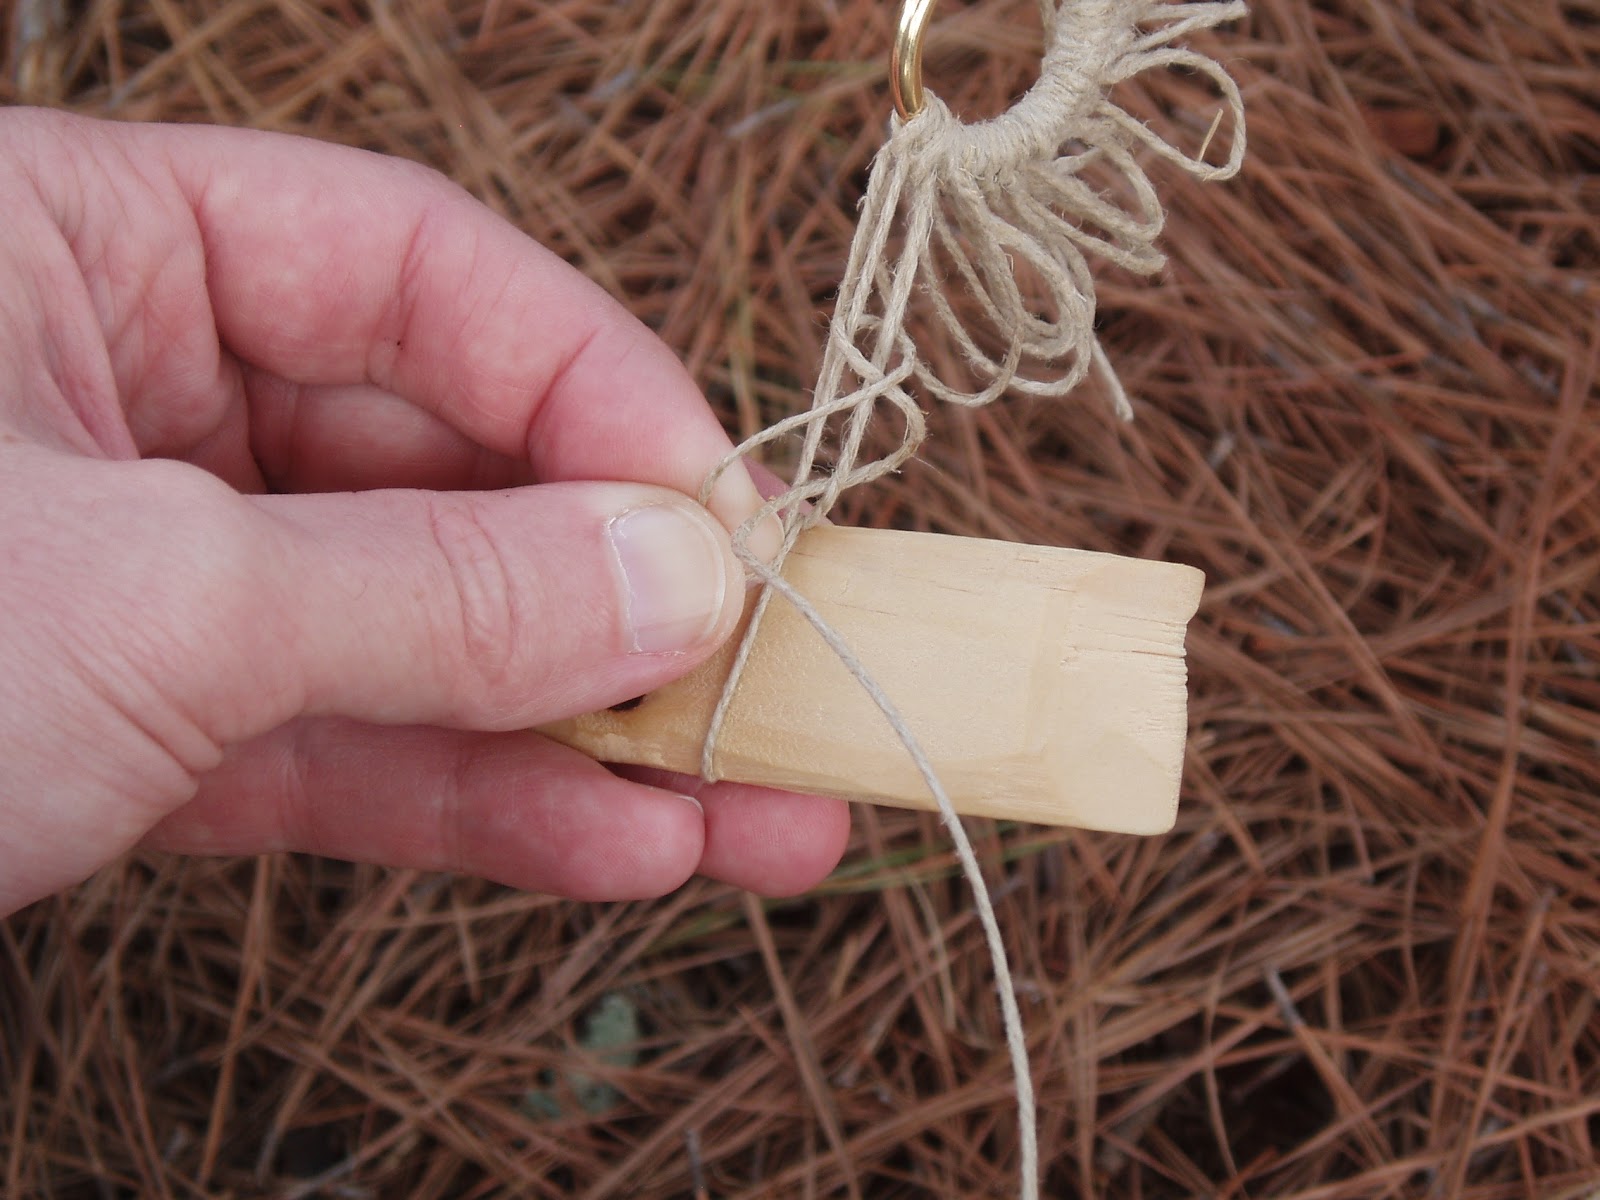
Place the spacer under the string.


Bring the needle around the back of the spacer and through the first loop.


Pull tight.


Bring the string up to make a loop while keeping the string tight around the spacer.


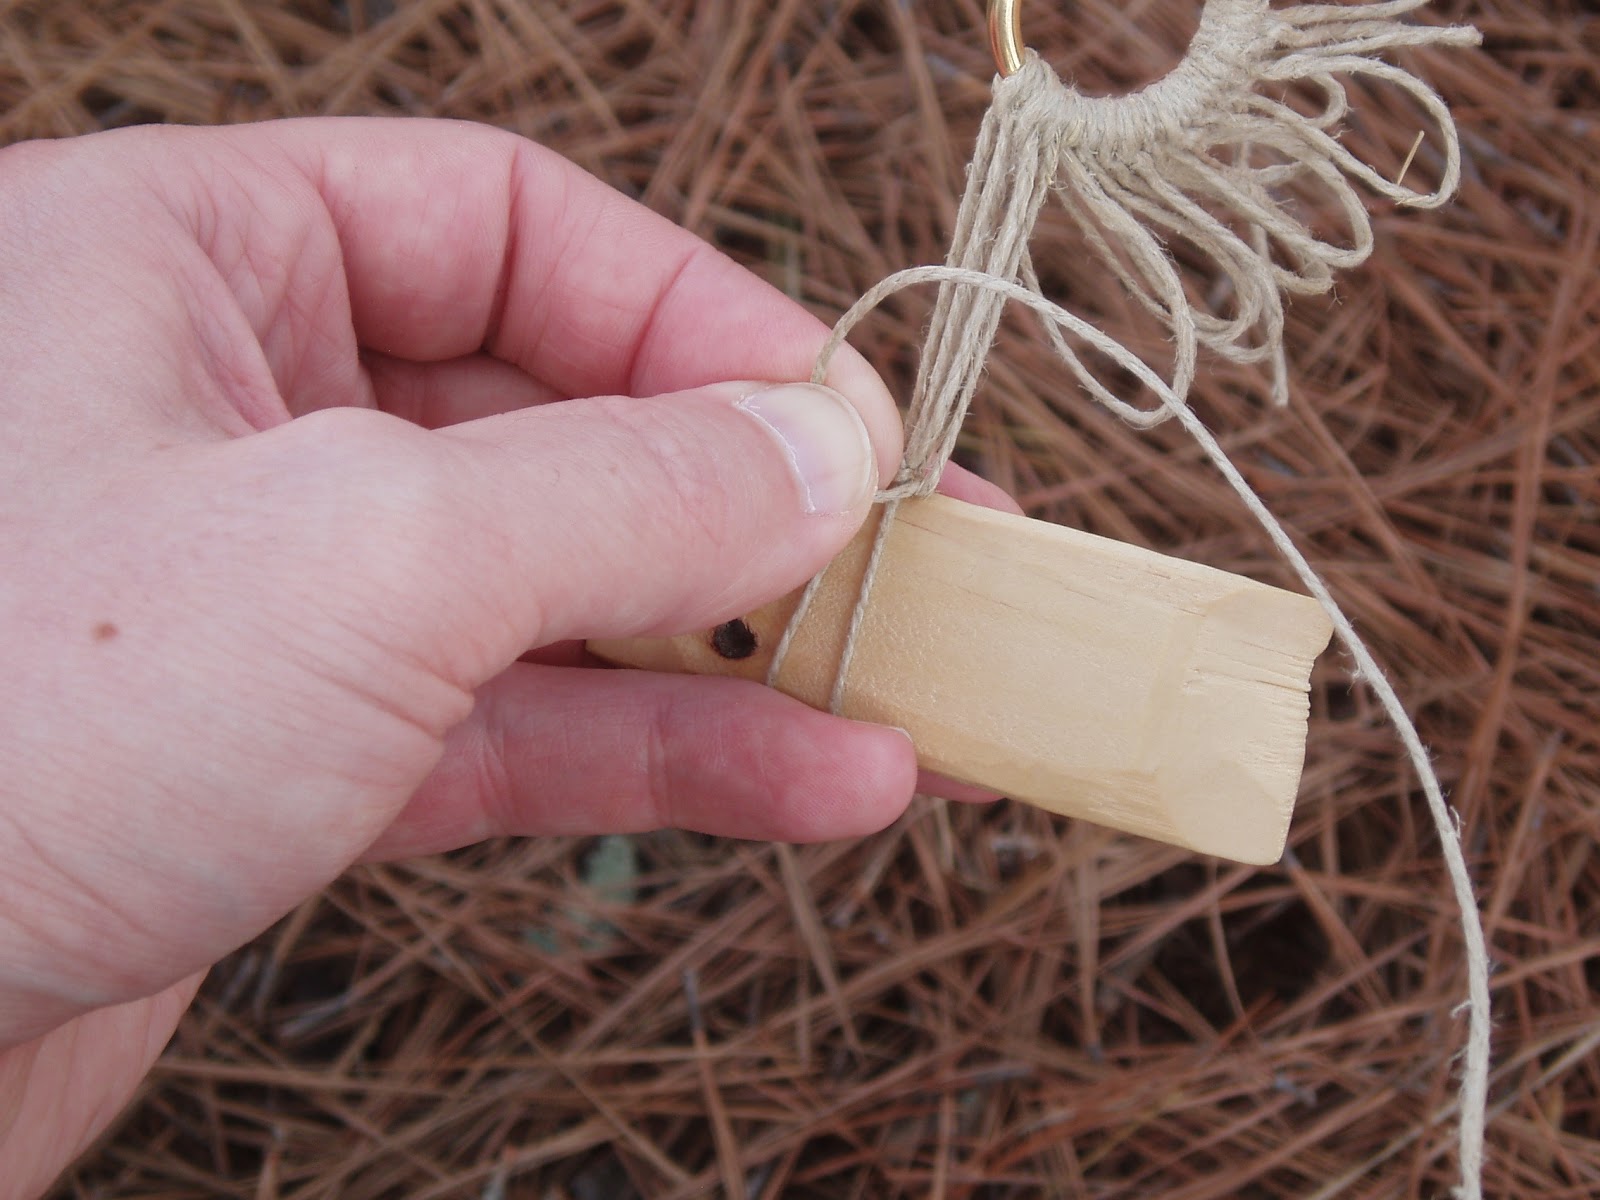
Thread the needle from the back around the two strings and through the loop.


After threading this through don't pull it tight.


Instead, pull the string up and out of the way.


With the string out of the way, bring the needle between the two strings.


Pull the string through and tighten the knot down.


Repeat this entire process until you have stitched up all the loops.


When finished with this, slide the wooden spacer out and you will see the new row of netting just made.


Continue to repeat the method row by row until you've reached the length on netting you want.


Pages